.png)


Stained glass has been a revered art since the 1st century AD, often associated with churches, cathedrals, and other historical buildings. However, in recent years, stained glass has found its way into many homes, creating beautiful, colorful works of art that combine both craftsmanship and creativity. Today I’d like to share my passion with you - creating a work of art that is activated by light or the sun to inspire you and brighten up any room.
Design
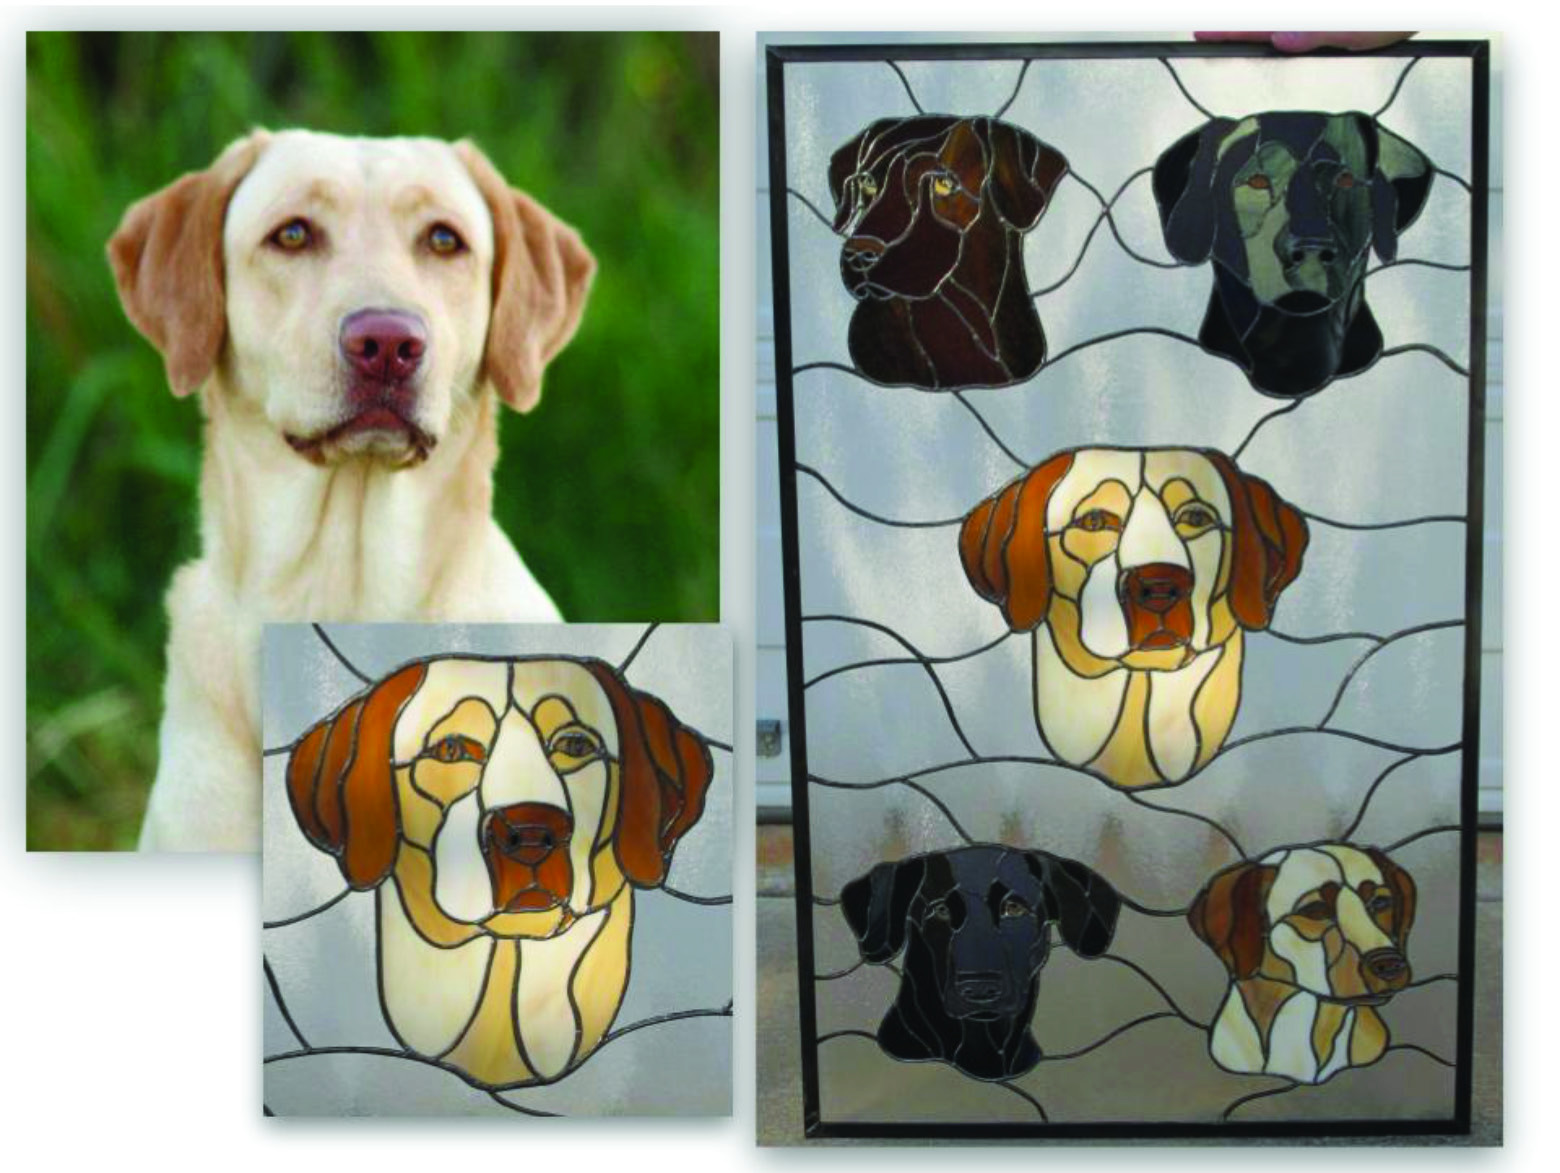
Stained glass art starts with a design, which can be as simple or complex as you want. I’ve drawn designs on scrap paper and tracing paper, as well as using a drawing program on my computer. A design just needs to outline each piece of glass you will cut. Designs should avoid sharp curves and angles, as glass tends to break in straight lines.
Cutting & Shaping
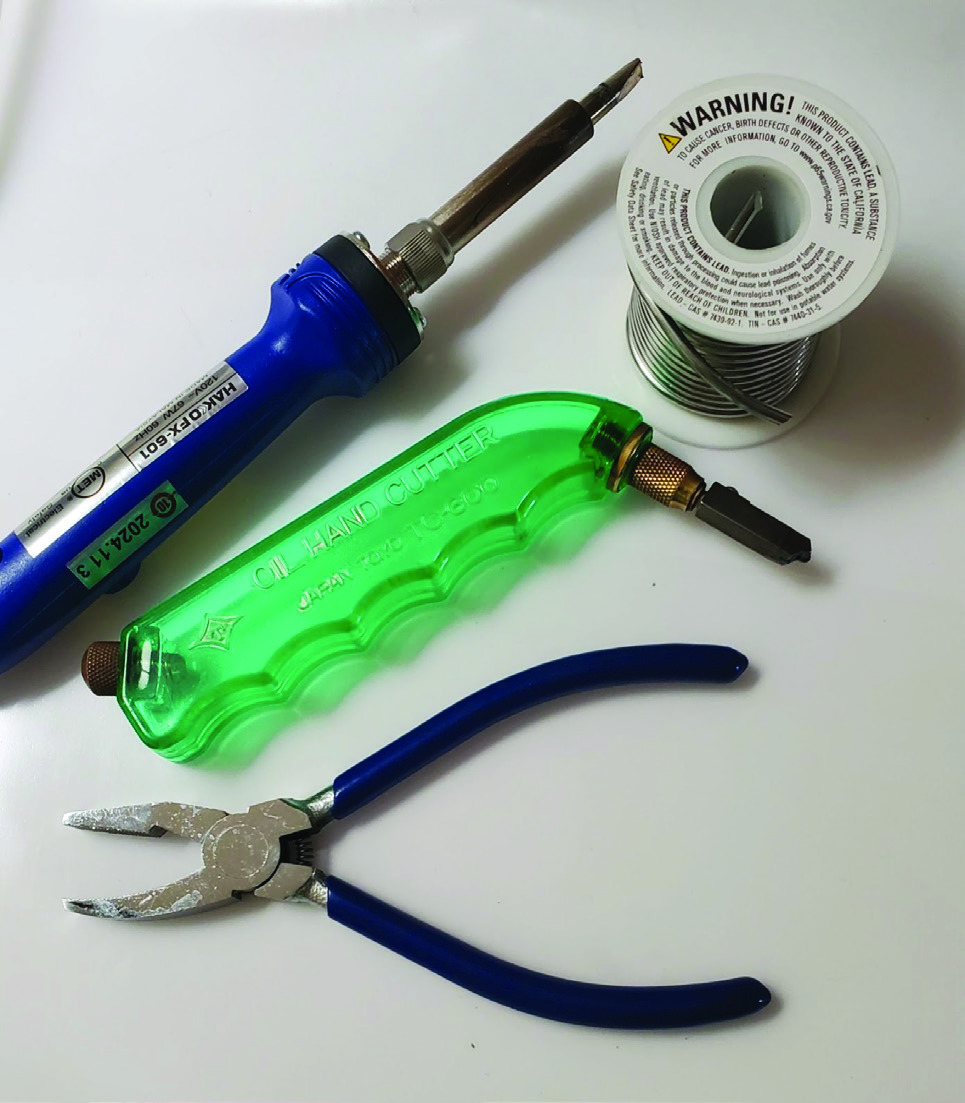
Once you have a design, to create it you need to cut and shape each piece to fit together. The type and color of glass you use will affect the final appearance of your piece. Not all glass is created equal! There are many different kinds of stained glass, including transparent, opalescent, and textured varieties. Some are thin, some are thick, which comes into play when you are crafting your work. Selecting the colors is an art form because you need to consider differing light patterns at different times of the day in the room where your art will be placed. Trace each piece of your pattern on the color(s) of glass. Using a glass cutter, score the glass along the lines of your design. When scoring, it’s important to make a single, even cut. After scoring, use pliers to snap the glass along the scored line.
BINDING & SOLDERING
Once you have cut the glass pieces, you need something to hold them together. Traditional stained glass windows use lead came (a type of lead channel) to hold the glass pieces together; copper foil is a more recent (1800s) technique which is easier for creating smaller, more intricate designs. Some designs use both! I mainly use the copper foil method.
Using the copper foil method, you’ll wrap the edges of each piece of glass with copper foil. The foil must be wider than the thickness of the glass so you can fold it over to make a foil edge with which to bind the pieces together. Solder, a metal alloy usually made up of tin and lead, binds the pieces together. Flux is applied to the copper foil to prepare it for solder and improves the strength of the joint between glass pieces. A soldering iron melts the solder onto the copper foil edges, binding the glass pieces together. Once all the copper foil edges are soldered on both sides, clean the glass thoroughly to remove any residue left from the soldering process using a mild dish soap and water with a toothbrush or soft sponge. Last, solder a wire ring to the piece to hang it.
ENJOY
Enjoy your piece’s interaction with light when you display it in a window or outdoors. Whether it's sunlight streaming through a window or artificial light illuminating the piece from behind, stained glass art creates a colorful, dynamic effect that is both stunning and serene.
Making stained glass requires patience and practice, but the reward is a beautiful and lasting work of art that is crafted by hand. For me, the process of making stained glass art is a fulfilling journey that brings color, light, and beauty into the world and I love sharing it with others.
Check out more of Mary’s sensational Stain Glass collection at Orcutt Glass Designs and consider a commission piece for the holidays!